"Cherishing Little Steps - A Haven for Baby and Family Journeys"
Fun Science Experiments for Children
Looking for a way to make learning fun? They say that ‘hands-on is minds-on,’ and what better way to engage your child’s curiosity than with some exciting science experiments?
In this guide, we’ll explore a variety of interactive activities that will not only entertain, but also educate your little ones. From creating a volcanic eruption to making a rainbow in a jar, these experiments are sure to captivate their imagination.
Watch as a balloon rocket zooms across the room or discover the secret of invisible ink. With easy-to-follow instructions and common household ingredients, you can bring the wonders of science right into your home.
So grab your lab coat and get ready to dive into the world of fun science experiments for children!
Key Takeaways
- Volcano Eruption and Baking Soda and Vinegar Reaction: Unleash the power of chemical reactions and explore the role of acids and bases.
- Rainbow in a Jar and Magic Milk Experiment: Explore color mixing and density to create beautiful shades and swirling colors.
- Balloon Rocket and Homemade Lava Lamp: Learn about rocket propulsion and air pressure, and create a mesmerizing lava lamp using household items.
- Invisible Ink and Egg in a Bottle: Create secret messages using invisible ink and learn about the science behind it, and witness the intriguing phenomenon of an egg being pushed into a bottle seemingly defying gravity.
Volcano Eruption

Get ready to make your very own volcano eruption! It’s time to unleash the power of chemical reactions and tap into the Earth’s geothermal activity. This exciting experiment won’t only entertain you but also teach you about the science behind volcanic eruptions.
To create your volcano, you’ll need a few simple materials. Gather some baking soda, vinegar, dish soap, food coloring, and a container to build your volcano around. Start by forming a volcano shape using clay or playdough, making sure to leave a hole at the top. This will act as the volcano’s crater.
Now, it’s time for the magic to happen! Pour a generous amount of vinegar into the crater, adding a few drops of dish soap and food coloring for extra effect. Then, slowly sprinkle in the baking soda. As soon as the baking soda mixes with the vinegar, a chemical reaction occurs. Carbon dioxide gas is released, causing a bubbling eruption that mimics the real thing.
As you watch the volcano erupt, take a moment to appreciate the power of chemical reactions and the Earth’s geothermal activity. This experiment allows you to explore these natural phenomena in a safe and exciting way.
Rainbow in a Jar

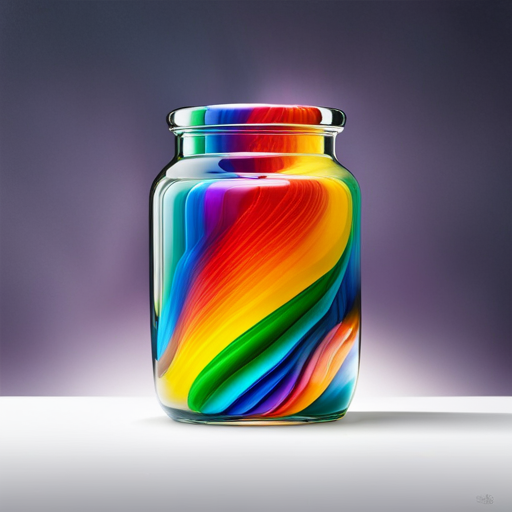
Create a vibrant rainbow in a jar with this fun science experiment! Get ready to explore the fascinating world of color mixing and density. This experiment won’t only amaze your little ones but also teach them about the wonders of science.
To begin, gather some materials: a clear jar, water, food coloring (red, blue, and yellow), and a spoon. Fill the jar three-quarters full with water.
Now comes the exciting part – adding the colors! Add a few drops of red food coloring to the jar and watch it sink to the bottom. Next, add a few drops of blue food coloring and observe as it settles just above the red layer. Finally, add a few drops of yellow food coloring, which will create a layer on top.
Voila! You now have a rainbow in a jar! This amazing effect is created by the different densities of the food coloring. The heavier colors sink to the bottom, while the lighter ones float above. The layers of color mix slightly, creating beautiful shades in between.
This experiment isn’t only visually stunning but also a great opportunity to talk to your little scientist about density and color mixing. Enjoy the magic of science as you create your own rainbow in a jar!
Balloon Rocket
Grab a balloon and get ready to launch your very own rocket! The balloon rocket experiment is a thrilling way to explore the principles of rocket propulsion and air pressure. By harnessing the power of air, you can create a mini rocket that zooms across the room.
To conduct this experiment, you’ll need a few simple materials: a balloon, a long string, a drinking straw, and some tape. Follow these steps to create your balloon rocket:
- Inflate the balloon and pinch the end to keep the air trapped inside.
- Attach the drinking straw to the balloon using tape, making sure it’s pointing away from the balloon.
- Tie one end of the string to a sturdy object, like a doorknob or chair.
- Thread the other end of the string through the drinking straw, creating a track for your rocket.
Now, it’s time to launch your rocket! Release the balloon and watch as the air rushes out, propelling the rocket forward. The force created by the escaping air is an example of rocket propulsion. As the air pushes in one direction, the rocket moves in the opposite direction, just like a real rocket in space.
Through this experiment, you have witnessed the power of air pressure and how it can be harnessed to create movement. Have fun experimenting with different variables, such as balloon size or string length, to see how they affect the rocket’s speed and distance traveled.
Happy rocket launching!
Invisible Ink
To make invisible ink, you’ll need a few simple materials. This is a great way to create secret messages, just like the ones used by spies in their cool gadgets. All you need is lemon juice or milk, a cotton swab or a paintbrush, and a piece of paper.
First, squeeze some lemon juice into a small bowl or pour a little milk into a shallow dish. Dip the cotton swab or paintbrush into the liquid and use it to write your message on the paper. Make sure to let it dry completely, as the ink will be invisible when wet.
Once the ink is dry, it’s time to reveal your secret message. Hold the paper up to a heat source, like a light bulb or an iron set on low heat. As the heat warms up the paper, the invisible ink will start to darken and become visible.
This simple experiment isn’t only fun, but it also teaches you about the science behind invisible ink. So, grab your spy gear and start sending secret messages to your friends. They’ll be amazed by your spy skills and the cool gadgets you’ve created!
Homemade Lava Lamp

To create a mesmerizing homemade lava lamp, gather the necessary materials and follow these simple steps:
-
Materials needed:
-
A clear plastic bottle
-
Vegetable oil
-
Water
-
Food coloring
-
Alka-Seltzer tablets
-
Procedure:
- Fill the plastic bottle about three-quarters of the way with vegetable oil.
- Add water to the bottle, leaving some space at the top.
- Wait for a few minutes to allow the oil and water to separate.
- Add a few drops of food coloring to the bottle. Watch as it sinks through the oil and mixes with the water at the bottom.
- Break an Alka-Seltzer tablet into smaller pieces and drop them into the bottle.
- Observe the mesmerizing reaction as the tablet fizzes and creates bubbles that rise through the oil and water layers.
Lava lamp science is all about the fascinating reaction between oil and water. The oil and water don’t mix because oil is less dense than water. When the Alka-Seltzer tablet is added, it reacts with the water, creating carbon dioxide gas bubbles. These bubbles attach to the colored water, making it less dense than the oil. As a result, the colored water rises to the top, creating a lava lamp-like effect. The process continues as long as there’s still carbon dioxide being produced.
Get ready for a captivating and colorful display as you witness the magic of the oil and water reaction in your very own homemade lava lamp!
Magic Milk Experiment
Now let’s dive into the captivating world of the Magic Milk Experiment. This exciting activity allows you to explore the properties of milk while creating colorful patterns that will mesmerize you.
To start, you’ll need a shallow dish or plate, whole milk, food coloring, and dish soap. Pour a thin layer of milk onto the dish, making sure it covers the bottom completely. Drop a few different colors of food coloring onto the milk, spacing them out.
Next comes the magic! Place a small amount of dish soap onto a cotton swab or toothpick. Gently touch the surface of the milk with the soap, and watch in amazement as the colors swirl and dance before your eyes. The soap disrupts the surface tension of the milk, causing the colors to move and create stunning patterns.
As you experiment, you’ll notice that the colors mix and blend in fascinating ways. You can try different techniques, like adding more soap or using different colors, to see how it affects the patterns. It’s a captivating experience that combines science and art.
Baking Soda and Vinegar Reaction

Get ready to witness an explosive reaction by combining baking soda and vinegar! This classic experiment is a fantastic way to introduce children to the world of chemistry and the wonders of chemical reactions. By mixing these two common household ingredients, you can create a fizzing and bubbling reaction that will captivate young minds.
Here are three key things you’ll learn when exploring the baking soda and vinegar reaction:
-
Exploring Chemical Reactions: This experiment allows children to observe a chemical reaction in action. They’ll see how the baking soda (a base) reacts with the vinegar (an acid) to produce carbon dioxide gas. This reaction is known as an acid-base reaction and is a fundamental concept in chemistry.
-
Understanding the Role of Acids and Bases: Through this experiment, children will learn about the properties of acids and bases. They’ll see that when an acid and a base come into contact, they can neutralize each other and create a new compound.
-
Safety Precautions: It’s important to discuss safety precautions with children before conducting this experiment. Remind them to wear safety goggles and protective clothing to prevent any mishaps. Also, emphasize the importance of adult supervision and handling chemicals with care.
By engaging in this baking soda and vinegar reaction, children will have a blast while gaining a deeper understanding of chemical reactions and the role of acids and bases.
DIY Slime

You often make DIY slime by mixing a few simple ingredients together. Slime is a fun and gooey substance that kids love to play with. Making slime at home is a great way to engage children in a hands-on science experiment.
To create your own slime, you’ll need a slime recipe and a few basic ingredients. There are many different slime recipes available online, ranging from simple ones that only require glue and borax to more complex ones that use ingredients like cornstarch or contact lens solution. Each recipe will provide specific measurements and instructions, so make sure to follow them carefully.
If you encounter any issues while making slime, don’t worry! Slime troubleshooting is common, and there are solutions to common problems such as slime that’s too sticky or too runny. You can find helpful tips and tricks online to fix any slime-related mishaps.
Egg in a Bottle

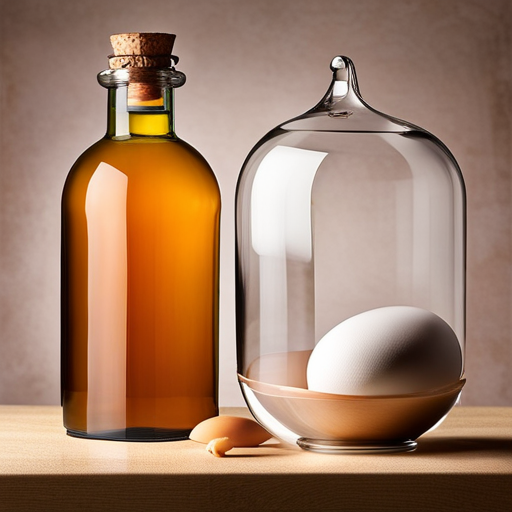
Mixing a few simple ingredients together like vinegar and a hard-boiled egg can create an exciting science experiment called the egg in a bottle. This experiment isn’t only fun, but it also teaches children about air pressure and the chemistry behind the experiment. Here’s how it works:
-
First, gather the materials needed: a hard-boiled egg, a glass bottle with a narrow opening, and some vinegar.
-
Place the glass bottle on a flat surface and pour a small amount of vinegar into it.
-
Carefully peel the hard-boiled egg and place it on top of the bottle, making sure it completely covers the opening.
-
Now, watch as the magic happens! As the egg rests on top of the bottle, the vinegar starts to react with the eggshell, releasing carbon dioxide gas.
-
The gas fills up the bottle, creating higher pressure inside than outside.
-
Eventually, the pressure difference becomes so great that it pushes the egg into the bottle, seemingly defying gravity!
This experiment demonstrates the power of air pressure and the chemical reaction between vinegar and the eggshell. It’s a great way to engage children in hands-on learning and spark their curiosity about science. So gather your materials and get ready for some scientific fun with the egg in a bottle experiment!
Dancing Raisins

Continuing from the previous subtopic of ‘Egg in a Bottle,’ let’s explore the fascinating world of dancing raisins. This experiment combines the carbonation effect and a buoyancy experiment to create a fun and educational activity for children.
To begin, gather the following materials:
- A clear glass or cup
- Carbonated water or soda
- Raisins
Now, follow these simple steps:
- Fill the glass or cup about halfway with carbonated water or soda.
- Drop a few raisins into the glass and observe what happens.
You will notice that the raisins start to dance and move around in the liquid. This is because the carbonation in the liquid releases carbon dioxide gas bubbles. As the bubbles attach to the rough surface of the raisins, they lift them up to the surface. Once they reach the surface, the bubbles pop, and the raisins sink back down. This cycle repeats, causing the raisins to dance and float up and down.
This experiment showcases the concept of buoyancy, which is the ability of an object to float in a liquid. The carbon dioxide bubbles provide enough buoyant force to lift the raisins, allowing them to dance in the liquid.
Water Bottle Fountain
To delve further into the world of fun science experiments, let’s now explore the captivating concept of creating a Water Bottle Fountain. This experiment won’t only amaze your child but also teach them about the fascinating principles of water pressure and air pressure.
Here’s how you can do it:
-
Gather the materials:
-
A plastic water bottle
-
A pin or needle
-
Water
-
A basin or sink
-
Start by filling the water bottle almost to the top with water.
-
Carefully puncture a small hole in the bottom of the bottle using the pin or needle.
-
Hold the bottle over the basin or sink and watch as the water starts to flow out through the hole. Notice how it creates a steady stream.
-
Now, squeeze the bottle gently. You’ll see that the water stream shoots higher due to the increased water pressure inside the bottle.
-
Release the pressure by letting go of the bottle, and observe how the stream returns to its original height.
This experiment works because the water pressure inside the bottle pushes the water out through the hole. When you squeeze the bottle, you increase the pressure, causing the water to shoot out with more force. When you release the pressure, the stream returns to normal.
It’s a simple yet captivating way to learn about the wonders of water and air pressure.
Frequently Asked Questions
How Long Does the Volcano Eruption Experiment Take to Set up and Complete?
To set up and complete the volcano eruption experiment using baking soda and vinegar, it takes around 10 minutes. You can easily create this fun science experiment using household items. Let’s get started!
What Are the Materials Required to Create a Rainbow in a Jar?
To create a rainbow in a jar, you’ll need materials like water, clear glass jar, light source, and food coloring. Follow these steps: fill the jar with water, add drops of food coloring, shine light through the jar. Enjoy the colorful magic!
How Does the Balloon Rocket Experiment Demonstrate Newton’s Third Law of Motion?
When you do the balloon rocket experiment, you’ll see how it demonstrates Newton’s third law of motion. The balloon pushes the air backwards, causing the rocket to move forward. Other examples of this law can be seen in everyday life too.
What Is the Best Method to Make Invisible Ink at Home?
Want to unleash your inner spy? Create invisible ink at home using lemon juice or milk and baking soda. These simple methods will have you writing secret messages that can only be revealed with a little heat or special light. Get ready to amaze your friends!
Can a Homemade Lava Lamp Experiment Be Safely Conducted by Children Without Adult Supervision?
Can children safely conduct a homemade lava lamp experiment without adult supervision? It’s important to consider the potential risks involved.
Conclusion
In conclusion, these fun science experiments for children are like a gateway to a world of wonder and discovery.
By combining simple ingredients and everyday objects, kids can unleash their inner scientist and create amazing reactions.
So grab a lab coat, put on your safety goggles, and dive into the exciting world of science with these hands-on experiments.
Let the sparks of curiosity ignite and watch as your child’s knowledge and imagination erupt like a volcano!


Lirigzon Gashi